This final assignment asks you to apply all you’ve learned in the course to build a collection of 10-12 final images on a theme of your choice.
When you’ve completed your collection, return to the brief that you set yourself at the start, and consider how well your completed project matches up to your original intentions. Write a reflective account of around 500 words to accompany your images. Below are a few ideas:
- How did you choose your theme?
- Was it a good choice?
- What went well?
- What went badly?
- Did you stick to your original brief or did you find yourself departing from it? If yes, then why?
- What technical problems did you experience?
- How did you solve any technical problems?
- Are you pleased with your final collection?
- What could you have done differently?
Before I begin this assignment, I remembered that my tutor gave me some advice regarding this upcoming final assignment. Below is his advice:
“Jumping ahead a little it might be worth thinking about the following in relation to the fifth and final assignment. The shots an editor would be expecting to see in a photo story would be Establishing [setting the scene], Portrait [Human Condition], Action and Detail shots. Obviously depending on what you are trying to say with the work, they would not always include all of these.
Photographic stories are the visual communication of a personal experience. They can be considered unique and can provide an excellent vehicle for personal expression. In order to communicate effectively, you must try to make a connection with what is happening. In order for this to work, you must research your subject thoroughly and if the story includes people, patiently observe before starting to photograph them.
Just to dwell on the subject of the photo story for a while, it is important for you to have a ‘point of view’ or an ‘angle’ for the story. With this work you could argue it was capturing the space of yesteryear. You must have an opinion about what is being recorded and this should in turn come across.
The most popular subject for the photo story has always been the ‘human condition’. The aim is usually to select one individual or group of individuals and try to relate their story to the viewer. The story may then relate the experience to a brief or extended period of time.”
After taking my tutors advice into consideration, I decided on a subject that I wanted to focus this assignment on. During my studies of Photography 1: The Art of Photography, my fifth and final assignment was Assignment Five: Applying the Techniques of Illustration and Narrative. For that assignment, I focused on Bristol zoo, and decided that I would base that assignment around the ‘Good Sides’ of zoos and conservation. I remember reading through my previous tutors feedback regarding that assignment, and it has played on my mind ever since. Below is some of her feedback regarding that assignment:
“I think that you have chosen a great subject in Bristol Zoo, you might be interest in the work of Britta Jaschinski “ZOO” where she took monochrome images within zoos but challenge the celebratory image of the zoo that the organization would want to put across, showing an oppressive place with animals shown very much as in captivity, perhaps with more of a political slant than the images you have produced.”
“You have adequately realised your ideas in this project and presented your work well. You show the zoo in some images as a place to visit to see these particular animals but I feel some images look a little more snapshot in appearance as they include the wires of the cages which you wouldn’t usually see in images to promote a place, zoos battle against this view that people have of animals in cages and focus more on the conservation side of things. It is more likely to see these sort of images in a more challenging work on zoos. For promotional work showing the positive side of zoos I would expect to see more images of animals looking like they are in their natural environment, for example the meerkat, bird and reptile images.”
I remember her feedback mainly because I agreed that some images I used included cages or glass windows, which is not something that you would want to include in a photograph if you were promoting zoos and conservation. As my tutor stated, if you were promoting a zoo, you would want to show the animals in their natural environment, not behind cages or glassed enclosures.
Thinking back to my tutors advice for this assignment; “Just to dwell on the subject of the photo story for a while, it is important for you to have a ‘point of view’ or an ‘angle’ for the story. You must have an opinion about what is being recorded and this should in turn come across.” Therefore, this meant that I have chosen to focus this assignment on ‘Bad Side’ of zoos and conservation. I would have to multitask whilst completing this assignment, and re-do my previous assignment ( Assignment Five: Applying the Techniques of Illustration and Narrative ) , as it wouldn’t make sense to keep the images which included cages in the previous assignment.
Therefore, for this final assignment, I will be focusing on showing the bad side of zoos and conservation. I will take my previous tutors feedback and I will study Britta Jaschinski. When shooting for my final images, I will focus on showing the animals in their cages, glassed enclosures and I would try to focus on their expressions to see if I could capture any depressed faces.
Before I began photographing any images for this assignment, I decided to do research regarding the bad side of zoos and conservation. We don’t usually hear about the bad side of zoos and conservation. I personally think that it is withheld for a reason, so that we don’t question their work, the captivity side and any deaths for example. However, I also think that we purposely shield ourselves from even thinking that there is a bad side to zoos and conservation. When we visit a zoo, we think that out ticket monkey will go to help pay for the upkeep of the animals and the zoo itself, and when we are inside, all of the animals are happy, well fed, looked after, enjoying where they are, however, this may not be the case, and these false smiles and fake behaviour could in fact be hiding something much more shocking and upsetting. I wanted to make sure that I began with research, in order to see the wider perspective of this subject. I didn’t want to be just influenced by my feelings and my previous experiences of zoo visits, I wanted other people’s views and opinions, to help me gain knowledge of bad experiences that they may have witnessed for example.
I began by reading an article written on the PETA website regarding the reality of zoos. The article was written by Michelle Carr in 2013. http://www.peta.org/living/entertainment/reality-zoos/
Michelle Carr wrote this article, in response to a question she had received from a reader. The question was from an animal lover in St. Louis USA , this reader asks; ‘ I’m a huge animal lover, and I understand why the circus is bad for animals, but what about zoos?’ Carr responds by confirming that not many people are aware of the amount of cruelty behind zoos. She goes on to explain her experiences when visiting zoos as a child and quotes, ‘When I was a kid, I went to the zoo all the time with my family. I loved pandas as a kid (still do!), and I thought being able to see them in person would be neat. But once I saw them “up close and personal,” I realized that the animals were miserable. It instantly became very clear to me that the animals imprisoned in zoos are sad and don’t want to be kept in artificial environments, have people gawk at them, listen to children who bang on the windows of their enclosures, or have cameras flashing in their faces. To put it simply, zoos are imprisoning animals who want to be free’.
This is sad to hear, as my own personal experiences when visiting zoos as a child, have been exciting and good. I have always loved visiting the zoo, and still do, so to hear that someone who was a child at the time, noticing something like this and realising that something was wrong, even back then, makes you question what really goes on behind closed doors, and how long has this been going on for.
Carr goes on to explain that captive animals are essentially deprived of everything, from their natural environment, all the way up to the correct type of food suitable for that animal. She advises the reader, that captive animals can sometimes suffer from ‘Zoochosis’, a heart-breaking condition which affects animals who have been confined for a number of years. This is usually shown by the animal rocking back and forth, or pacing around their enclosures. This is something that I have previously read about and have watched on documentaries on the television. It is an awful thing to watch, and I am fortunate to have not witnessed this in my local zoo. Carr explains that animals suffering from Zoochosis are often given medication such as Prozac, which will alter their mood, essentially calming them down and making them more docile, in order to stop the symptoms, as visitors to zoos were stating to witness the behaviour problems first hand, and were raising the issues with the zoo itself.
I read an article written by Liz Tyson on 23 June 2014, after she had visited Chester zoo, UK. She mentions that she witnessed an elephant showing the symptoms of Zoochosis with constant head rocking and swaying. Her article includes a short video which is extremely sad to watch, but I have included a link below so that you can read her article and watch her video. https://www.thedodo.com/community/Liz_Tyson/if-we-really-care-about-animal-601151421.html
Carr advises us that a gorilla named Jabari in a Dallas zoo, was shot dead by police, after an attempt to escape his enclosure. A witness described that a group of teenagers had been tormenting the gorilla, throwing rocks at him and taunting him, causing the male gorilla to attempt an escape. He jumped over the walls and moats of his enclosure, only to be fatally shot. This is an extremely sad story, something which makes you sit back and question just exactly what must have been going through the gorillas mind at that time. Imagine if roles were reversed, and that was a human, being taunted, stoned with rocks and shouted at by another group of humans…. Not only is that illegal and should be a prosecution case, but it is disgusting behaviour, and the gorilla must have been terrified and petrified. Just because it happened to a wild animal, who was imprisoned in a cell, doesn’t mean that what happened was ok. This animal was shot dead because he wanted to escape this bullying and stoning. What makes this ok? Has this happened in other zoos? I hope it hasn’t, but I was shocked to even read that this has happened.
Carr then goes on to explain that un-natural weather environments such as severe cold, rain and wind, can debilitate certain animals. Lucy, a lone elephant from Edmonton zoo is usually locked inside her barn during the frigid cold winters. This means that Lucy only has a small amount of room to walk around, and is therefore locked inside for a long period of time. The constant confinement during these winter periods, have left Lucy with extremely painful and debilitating arthritis. Elephants are known to walk 30 miles in one day, but Lucy doesn’t even come close to walking that long. She has been withheld from her natural instinct and is now left with this crippling arthritis, she will be able to walk even less than she did before.
How is this ok? Why are we not told about this….? Are we only shown the ‘Pretty’ side when we visit, when in reality, behind closed doors, these things really are happening? Perhaps we as visitors are held back at a long enough distance, so that we don’t see the truth behind what really happens. Carr mentions that we as visitors, only usually spend a few seconds or minutes at the enclosures, waiting for the animals to do something exciting. So we don’t actually spend enough time looking and observing the enclosures, or the animals. Therefore we miss things.
In addition, captive animals don’t get to choose who they mate with, like they would in the wild. They are in fact, usually artificially inseminated for breeding purposes, leading to sales and trading of young between other zoos. This artificial breeding can lead to miscarriages, death and rejection between mother and baby, probably because they don’t actually know what this baby is and what to do with it, because they haven’t been taught by their mothers. This is really sad, and especially the loss of a baby, and in some circumstances, it’s a baby of an endangered species which makes it even more precious.
In regards to what Michelle Carr advises regarding zoos, she quotes; ‘ Instead of going to the zoo, you can learn about animals by watching nature documentaries or observing the animals in their own natural habitats instead. Now that I know the reality behind zoos, I don’t go to the zoo, and I encourage my friends and family to boycott them as well. I love animals, and I want to see them free, not held captive behind bars!’
I read a further two articles regarding the bad sides of zoos and conservation. Both of these articles have bullet points as to how zoos fail, and what is actually happening behind our backs. I have included the link to both articles below, however, I will include the bullet points from article two below.
Article One: PETA – 13 Times Zoos Were Bad for Animals – http://www.peta.org/features/zoo-animal-abuse/
Article Two: CAPS – 10 Facts about Zoos – March 3rd 2010 – http://www.captiveanimals.org/news/2010/03/10-facts-about-zoos
Captive Animals Protection Society / CAPS – 10 Facts about Zoos – March 3rd 2010:
- Zoos are miserable places for animals
- Zoos can’t provide sufficient space for the animals
- Animals suffer in zoos
- Animals die prematurely in zoos
- Surplus animals are killed
- UK Zoos are connected to circuses
- Animals are trained to perform tricks
- Animals are still taken from the wild
- Zoos don’t serve conservation
- Zoos fail education
After doing my research regarding arguments against zoos and conservation, I decided to do photographer research. I decided to begin with Britta Jaschinski.
Britta Jaschinski

Britta Jaschinski by Spiros Politis
Jaschinski is a world-renowned, award-winning, German photographer. She learned the skill of photography whilst working in a German advertising studio. She studied photographer’s art whilst at Bournemouth College of Art and Design. Ever since she was young, she had empathy for animals.
On January 1st 2010, Sublime Magazine published an article about Britta Jaschinski called ‘Cage Fighter’ written by Stephen Armstrong.
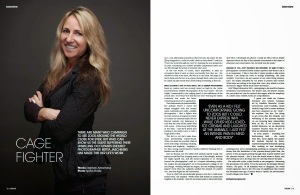
Britta Jaschinski, Sublime Magazine. Article ‘Cage Fighter’ by Stephen Armstrong, January 1st 2010
Her parents quoted that they would find Jaschinski ‘Scooping insects out of her sandpit, worried she might squash one, she turned vegetarian at 16′. Her animal and nature photography has won her a dedicated and strong international following.
Walking past London Zoo gave her an idea which later turned her into a well-known international photographer. Jaschinski quotes in an article for Sublime magazine ‘Even as a kid I felt uncomfortable going to zoos but I could never express why,’ she explains. ‘While other kids licked ice creams and laughed at the animals, I just felt an intense pain in mind and body. And when I developed my photos I could see why I felt so deeply depressed about the fate of the animals incarcerated in the name of education and conservation. My Zoo book was the result.’
On May 13th 1996, Phaidon Press published her Zoo book. 112 pages of black and white, bold, captivating photographs which showed animals in concrete cells, glass compounds and caged exhibits. Below are two reviews for her book;

Britta Jaschinski
Zoo
Phaidon Press – 1996
ISBN-13: 9780714834726
ISBN-10: 0714834726
‘A point forcefully made through outstanding photography.’ (Amateur Photographer)
‘Here is a book with almost no text, but full of unease and mystery…’ (The Good Book Guide)
Her second, Wild Things followed in 2003. This photo book is quite simply apologising to the world for human interference and destruction.
She is a member of CAPS, which stands for Captive Animals’ Protection Society
She quotes:
“We talk to animals but we don’t listen to them. We stroke them with one hand and beat them with the other. CAPS gives animals a voice and fights for their rights. Animals don’t need us but we need them. We must protect them from ourselves.” Britta Jaschinski.

Britta Jaschinski, Zoo
1996
This image is saddening, elephants are beautiful, majestic animals, and when I think of elephants, I think of them in their natural environments. Seeing an elephant behind bars, to me symbolises the same as being a prisoner in a cell. The trunk of the elephant is reaching out almost to touch the walls trying to find a way out, or shouting after someone for help to get out of the cell. This is a very strong image, and as a viewer, it is sad to see this. You don’t want to think of an animals stuck behind bars in a zoo, however, if you were to perhaps look deeper into the story behind this elephant, it may not stay in this cell all day, it probably only sleeps in there or perhaps is in there for a short period of time, and in fact has a bigger enclosure somewhere. However, seeing this image shocks you first into thinking about this poor elephant trapped, and not necessarily thinking about the story behind the image.

Britta Jaschinski, Zoo
1996
This is an interesting image. Jaschinski has managed to incorporate the scratches on the glass windows of these primates enclosure. For me, when I visit the zoo, I stand for ages looking into the eyes of the primates, as you can tell so much from their eyes. You can see when they are sad, happy or even depressed. Jaschinski has managed to capture both of these primates eyes, which can be hard, as usually one animal always moves or looks away when you try to photograph them. Capturing both sets of eyes is great, as this has created a depressing looking image. You can see the boredom and depression in their eyes. The scratches on the panes of glass can be interpreted as escape attempts, or boredom. This is a very interesting image, and something I will keep in mind when photographing the zoo.

Britta Jaschinski, Zoo
1996
When I think of a camel, I think of the desert, lots of sand, beaming sun. However, this is thee complete opposite. Concrete walls and wire to keep the camel from escaping. The enclosure doesn’t even look as though it is suitable for a camel to reside, it looks small. Similar to the elephant photograph, perhaps there is a story behind why the camel is in this concrete enclosure, however, a photograph speaks a thousand words, and when you see this first, you immediately think that the camel is trapped in a cell.
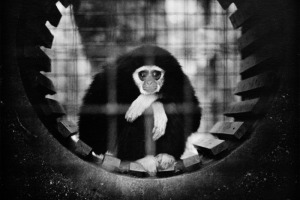
Britta Jaschinski, Zoo
1996
It’s hard to say that this is my ‘Favourite’ photograph, however, it is. Jaschinski has captured an amazing image here of this gibbon monkey. When I look at this photograph, I can almost feel the sadness, the depression, the boredom of this little monkey. She manages to compose this image so the monkey is in the centre of the frame, surrounding it with what looks like a circular toy or running wheel, keeping him as the main focal point in the image. She keeps the monkeys eyes visible, in order to see his expression clearly. She also manages to capture the cage wires ever so faintly in the foreground, they aren’t distracting which is good, as you want the focus to be on the monkey, however, you can still see that there are wires, and this monkey is enclosed and bored in his enclosure. This is such a brilliant photograph, and I hope to capture something similar when I photograph the zoo.
Looking at Jaschinski’s Zoo photographs, one thing that is noticeable is that she uses black and white / monochrome. Using black and white enables you to bring the viewer’s attention to details within the image such as the wires from the cages, scratches on the panes of glass and the look of depression in the animals eyes. Using colour within photographs like this may distract viewers from the main subject, keeping to black and white gives you the impression of depression, bleakness, coldness, giving the appearance of a dull world that these animals live in. You are also able to show the detail from the scratching of the glass, dirt on the walls or wires, which you may not see so clearly in a colour photograph,
Keeping the cage wires, scratches in the glass windows and black and white final images, is something that I will remember when shooting my photographs and when I am processing my final images.
The second photographer I researched was Garry Winogrand.

Garry Winogrand Self Portrait
Garry Winogrand was born January 14th 1928, in New York City. After high school, he enlisted in the US Air Force, but later returned to New York in 1947 to study painting at City College of New York and Columbia University.
He later decided to focus his studies on Photography and Photojournalism, which he proceeded to study in college. In the 1950’s and 1960’s, Winogrand began working as an advertising photographer and a freelance photojournalist.
In 1969, Winogrand’s photographed his observations of the Bronx Zoo and Coney Island Aquarium. A collection of these photographs completed his first photo book called ‘The Animals’, which contained images showing the connections between humans and animals.
‘Winogrand’s zoo, even if true, is a grotesquery. It is a surreal Disneyland where unlikely human beings and jaded careerist animals stare at each other through bars, exhibiting bad manners and a mutual failure to recognize their own ludicrous predicaments’.
–John Szarkowski

Garry Winogrand, The Animals, 1968.
Published By:
The Museum of Modern Art, New York; 2nd edition (April 2, 2004) ISBN-10: 0870706330 ISBN-13: 978-0870706332

Garry Winogrand, The Animals, 1968.
This image for me represents young children’s attention spans. You don’t normally see rhino so close, it’s not an everyday occurrence that we are fortunate to one. When I think of rhino’s, I think of the African safari sites. However, these children clearly aren’t interested in looking at these beautiful animals, which by the way are an endangered species, but they are more interested in hanging off of the railings like monkeys hanging from monkey bars. Even the mother is more interested in watching these two children messing around, then looking at the rhino. This is an interesting subject, and knowing that there will be similar situations at Bristol zoo when I go, I will keep an eye out for situations like this, which I can photograph.

Garry Winogrand, The Animals, 1968.
This is a sad image. Winogrand manages to capture the eye of this rhino, looking up to this gentleman. In the real world, unless you are on safari, lucky enough to get this close to a rhino, then there is no way you could possibly be this close. Capturing this intimate moment of curiosity, shows how this rhino is not acting how it would in the wild. It is sad to see that an animal which should be scared of humans, is actually showing it’s helplessness, and it’s need of human love. When shooting my images, curiosity from the animal to the visitor, is something that I would love to try and capture, as we should technically be curious about them as well.

Garry Winogrand, The Animals, 1968.
Who says that animals don’t have feeling! This is such a brilliant photograph. There is a saying ‘It’s like being in a zoo’, you normally hear that when you are in a crowded situation, being stared at. You may encounter this in a waiting room or a job interview. Imagine being in cages, enclosed for the rest of your life….. hundreds of scary, noisy people staring at you, shouting at you, poking you every day of your life. This is what it is like, being an exhibition piece in a zoo. Winogrand has captured a photograph showing the true feelings of what this bear thinks about being poked at. This is great! I have to keep this in mind when I shoot my images. Animals facial expressions and behaviour, can tell you a lot about how they are feeling in that current situation, and this bear does just that. I want to try to capture the expressions on the animals face when I shoot my photographs, as their expressions can really help make an image.

Garry Winogrand, The Animals, 1968.
This photograph is similar to Jaschinski’s photograph of the elephant in the cell room. Similarly, both of these elephants have their trunks stretched out, almost looking for attention, help, or a method to escape. This elephant is being hand fed by visitors by the looks of it, not something that would usually happen in the wild. The positioning and stance of this elephant is somewhat slumped and leaning, almost as though it has given up hope.

Garry Winogrand, The Animals, 1968.
This is an interesting photograph. To me, the visitors are more interested in other things, that they are not even looking at the seals. One woman looks like she is crying, one woman is being kissed by a male, whilst looking bored and uninterested, and one male isn’t even looking at the seals. From my point of view, the seals look more interested in the visitors, than the visitors being interested in the seals. This shows how we as visitors take these animals for granted. You wouldn’t normally be able to see these animals this close in the wild, so why not appreciate seeing them this close now…… They are positioned directly in front of you, yet you still ignore them…. This is something that I need to look out for in the zoo when I shoot my images. Lack of interest from the human side, yet much interest from the animal side, shows almost a role reversal.
The composition of this photograph is also interesting, as Winogrand has composed it so that there is only a small amount of water visible. It doesn’t look as though it is enough water for all of them to reside or swim in on a daily basis. I personally think that this is done purposely, to portray and even smaller enclosure and lack of room or space, making us as the viewer concerned about how small their enclosure must be.
Comparing Winogrand’s work to Jaschinski’s, I can see some similarities and some differences. Thee most obvious being that they both have used black and white / monochrome photographs. Thus meaning that each image draws the viewer’s attention in without the distraction from any colour. The second being that they both decided to keep the cages, wires and glass in the image, adding to the hidden message of captivity and depression. Winogrand, however, makes a purpose of including people within his photographs. Including guests at the zoo, observing the animals, with the animals observing the guests gives the image two stories. One being what the people within the photograph were thinking when looking at the animals, and the second being what the animals were thinking when looking back at the people. The inclusion of people looking at the animals and the animals looking back has a sad message of captivation, not being able to leave that enclosure, being stared at constantly with little children making strange scary noises, and banging the cages or glass windows. The saying ‘ It’s like being in a zoo’ springs to mind, when I look at photographs like this, because we as humans don’t necessarily enjoy being stared at by fellow human beings, however, on a daily basis, these animals are being watched, stared at, tormented and locked in an enclosure.
This is very interesting and is something that I will think about when shooting my photographs. Including people in the image may help make an interesting photograph.
I have found an interesting blog regarding zoos and Winogrand’s work. Written by Peter Barker on February 28th 2013, http://peterbaker.org/the-animals/
Barker writes about whether or not Winogrand was photographing the ‘Truth’ about what really happened / happens at zoos, whether he was finding the confinement of animals who had to perform tricks for food funny, or whether he just photographed these situations for us, the viewers to make our own choices. Peter Barker doesn’t agree that Winogrand’s zoos are everywhere, and there is infact brilliant zoos around. Zoos which don’t humiliate animals in the return for treats, zoos which care for the conservation of the species, and zoos which show that animals are happy in the environment that they are in.
However, Barker then goes on to question whether or not these ‘Happy’ outer appearances are in fact just for show, and whether deep down, Winogrand did actually manage to see beyond the ‘Front cover appearances’ and captured the sadness within each animal.
‘Until relatively recently zoos were called menageries, and were hobbies of princes, serving the same function as court dwarfs and court musicians. After the rise of modern science such simple entertainments seemed frivolous, so menageries were called zoological gardens—the idea being that they were really laboratories for the study of animal behaviour. While this concept is superficially plausible, a moment’s thought makes it evident that one cannot very well study the behaviour of lions and gazelles, for example, as long as they are locked in separate cages. The real reason that zoos have been built, and even sustained with tax money, is that people think that the other animals are (1) noble, or (2) funny looking. Winogrand’s book proves that those who hold the second opinion are correct. The other animals are indeed funny looking.’ Peter Barker
‘For those of us on the other side of the bars the case is less clear. We are there because animals look funny, or conceivably because they look noble, but there may be a darker side to the satisfaction we find at the zoo. It may be that we are relieved to find that even the animals, with their much-‐publicized supposed virtues—sharp of tooth, swift of foot, courageous in protecting their young, good eyes, etc.—that even the animals can be reduced to a state of whimpering psychic paralysis if they are forced to live in circumstances similar to those of the typical modern urban dweller. After all that has been said in the past fifty years concerning man’s deep-rooted inadequacies, it is bracing to go to the zoo and observe that the orangutang, magnificent though he may be in the jungle, is no better than the rest of us when forced to live in a modern city.’ Peter Barker
Whether what Peter Barker is saying has any truth to it, and whether or not you or I agree or disagree with what he is saying, you can see from Winogrand’s photographs, that there is indeed some truth to this. Zoos have been called Zoological Gardens to make it sound ‘Better’ and more appealing to us as customers. We want to think of the animals in their natural environments, even though we know that’s merely impossible as we are entering a concrete jungle, filled with cages and windows, for us to peer in and look at them. One can argue that yes, zoos do a brilliant job at saving animals, helping with conservation so that in years to come, when several animals which are then extinct, can be used to re-produce to then re-populate the wild. However, is keeping them locked away in these concrete, caged houses, really the best thing for them in the end. This is a discussion that could have many answers, and can be looked at from many different angles, linking it to things such as hunting and poaching. The possibilities are endless.
The third photographer I researched was Michel Vanden Eeckhoudt.

Michel Vanden Eeckhoudt
Eeckhoudt is a Belgian photographer, who lives in Brussels. He is well-known for his animal photography, just like Jaschinski and Winogrand. Usually, his animal photography looks into the troubling and sad relationships between pets and their masters, however, in 1982, a book called ‘Zoologies’ was published containing sad images of captive zoo animals.

Zoologies
Michel Vanden Eeckhoudt Paris: Delpire, 1982.
ISBN: 2851071041
“The clear, cold and cruel eye of Michel Van Eeckhoudt forces us to see what onlookers zoo perhaps forget to see: that the animals in the pen are the largest permanent exhibition of sadness.”

Zoologies 1928
Michel Vanden Eeckhoudt
This too is a sad image, similar to that of Jaschinski’s gibbon monkey. With this monkey however, having it almost pleading for help with hands on the glass, is extremely sad.

Zoologies 1928
Michel Vanden Eeckhoudt
To me, this shows the sheer ignorance of humans. Eeckhoudt has captured a moment in time which shows one of thee most majestic, powerful and dangerous animals on this earth, being harassed by a man in a suit, somewhat sticking his face or head, into the lion’s head and mouth area. Fair enough, by all means get a close look at one of these incredible animals. When I’ve visited the zoo before and the Lion enclosures, I’ve stood for ages just watching the lions, simply because I will never be able to get that close to a wild animal like this again, unless I am fortunate in the future to go on a safari. However, I don’t torment the animals, by poking them, sticking my face in theirs and so forth. The sheer ignorance of this man astonishes me, if this was in the wild, this Lion would have eaten you. Just because it’s behind bars and it’s dignity, rights, and life has been taken from him, doesn’t mean that we as visitors have the right to not respect them still. You are tormenting him, and almost taunting him by showing that you are now the dominant male, and I can do what I want because I know that these bars will stop you from eating me………… I hope not to see something like this on my visit, but you never know. If I do, I may have to photograph it to show human ignorance and lack of respect for animals.
I also find this an oddly composed photograph, I am unsure as to why he never cut the males face out from the right hand side of the frame, and only focused on the male in the background?

Zoologies 1928
Michel Vanden Eeckhoudt
This is similar to the enclosure we have at Bristol zoo, for the lions. People are able to get this close to the glass panels. I hope to shoot images like this, because I want to show again, how something that could kill a human being, is now stuck behind a pane of glass or a cage, still following you and looking at you as though you are prey….. the only thing is that these bars, and windows, are stopping them.
Comparing Winogrand’s and Jaschinski’s work to Michel Vanden Eeckhoudt, you can again see similarities and differences. The three of them use black and white / monochrome photography, to stop colour from distracting the viewer and to enhance to main message or subject within the photograph. Like Winogrand and Eeckhoudt, they both include the visitors to the zoo, within the photograph. They all include the cages, glass windows, scratches on the windows and depressed faces on the animals.
My Personal Project:
Taking my photographer research into consideration , I now know that for this assignment, I want to produce a set of photographs, using inspiration from all three of the photographers I have researched. Taking inspiration from my previous assignment, Assignment Three: Monochrome, I will convert my final photographs to monochrome, as by removing any colour distractions, I will be able to include different textures and details on the wire cages, glass panels, walls, details on the faces of the animals, sharper details on the facial areas. I will also be able to show different shapes and tones of enclosures. With the removal of colour and the inclusion of details and texture, I believe this will help to create a sombre, cold, depressed and sad feeling to each image, as it will show elements of the zoo, which can be missed or overlooked in a colour photograph.
I want to compose my images so that I include cages, glass windows, concrete enclosures and zoo visitors in my photographs. I will try to capture the moment when the animal(s) look back and the visitor(s), perhaps looking at each other through a cage or a window. I want to try and capture the expressions of the faces of the animals, including their eyes, as I believe this will help produce a better final image.
Therefore, for this assignment, I will be revisiting my local Zoological Gardens, Bristol Zoo. Pre-visualizing how I wanted my photographs to look, and knowing what animals I wanted to photograph, I decided that I would take my usual Canon 18mm-55mm lens, and my Sigma 70mm-300mm lens. Taking both a 55mm lens and a 300mm lens, enabled me to capture any small details on the animals faces, or capture any animals which were too far away in their enclosure. By using a long lens, I am also able to zoom into an enclosure, cutting out vacant space or parts of the enclosure I don’t want in the frame, and I am able to portray an even smaller enclosure, similar to how the photographers I researched have composed their images.
Having being born in Bristol, and visiting the zoo on that many occasions, I pretty much know my way around in the dark, however, with techniques learned at the beginning of this course, in Exercise: Your Own Workflow, I still decided to plan my visit so I knew exactly where to go and what animals to see first before any crowds arrived. I arrived at the zoo at approximately 11:00am. The zoo was quiet with only a handful of people walking around. I decided to go straight to the Lion enclosure, as I thought that by going there first, I would be able to photograph them without anyone in the way, especially as I know that throughout the day, the lion enclosure is extremely popular and would be busy. Unfortunately, they were sound asleep and wouldn’t budge for anyone. I was surprised that I was on my own, and I was able to take a quantity of photographs from different angles, of the lions asleep. At one stage, one of them woke up, and at the right time, I was able to shoot some images of him looking out the window as if to see where the visitors were. Of course, I did want to take photographs with visitors in the shot, similar to Eeckhoudt’s photograph of the tiger, however, being the only one there, I knew that I would have to revisit the lion enclosure later in the day for those shots.
After visiting the lion enclosure, I walked through the butterfly house, which was much too hot, and being as it was an actual reproduction of a tropical rain forest, I knew that this wasn’t the best place for taking ‘Captivity’ shots, as these butterflies and moths were almost in a real jungle environment, but that didn’t stop me from taking photographs which I knew I could use later on, with other assignments and projects.
After cooling down from the butterfly house, I decided to visit the giant tortoise, and reptile houses. By this time, it was mid-day, and therefore, crowds of people had arrived. It took me a while to manage to shoot the giant tortoise, as there were too many people stood in front of their glass enclosure. I could have photographed this, but as you couldn’t see that giant tortoise, I knew that this would be a wasted photograph, as it would only show a crowd of people looking into an enclosure, but we as viewers wouldn’t be able to see what was in that enclosure. Using my senses, I managed to find a small room where two other giant tortoise were. They were in a barren room, with just some bedding and lights. No one was looking at them, and to me, I knew this could be an interesting shot. I took several shots of this pair, however, I was then engulfed by people who had somehow managed to find this secret enclosure, which meant I then had to move along.
I worked my way around the zoo, until I reached the primate section and gorilla island. These have always been one of my favourite areas in the zoo, and I stand for ages watching the primates. You have to watch their every movement, as they always do something interesting, quirky or funny. Unfortunately though, I’m not the only one that loves the primate section. It was crowded and full of people. I knew that this was the perfect timing for me to stand back from the crowds, and shoot them watching the primates, as the primates then watched them in return, keeping in mind the work of Winogrand and Eeckhoudt. It is fascinating to watch, especially when you look at the primates eyes, and you can see confusion, depression and sometimes even sadness, at the simple fact that us visitors are stood staring at them whilst they go about their daily business. Once I had managed to shoot photographs of the visitors, I decided to focus on trying to capture some shots of the primates, similar to that of Britta Jaschinski’s work, especially of the gibbon monkey. They have an outside enclosure, which is caged off from the visitors. I decided to stand by the fences, and see whether or not they would venture out from their glass enclosure, as they were becoming agitated with the noise from children banging on the windows. I was extremely luck, and one brown spider monkey, decided to venture out into the caged enclosure. I was quick enough to be able to shoot some photographs, whilst he was climbing along the cages. And to my luck, he decided to sit right in front of my camera, on a tree, and positioned himself similar to that of Britta Jaschinski’s monkey. I was thrilled, and shot away making sure I captured this moment before he moved off inside again.
After this, I decided to visit the Gorilla island. By this time of the day, hundreds of visitors were now inside the zoo. They were doing a lot of renovation to the gorilla island area, and only the male silver back was inside the 360 degree glass enclosure. The rest of the gorilla family were outside, asleep on their island. I decided to focus on the male silver back, and stood at the back of the crowds, in order to shoot several images of the gorilla being watched by the visitors. Once I had photographed this, I managed to squeeze my way into a corner of the window area. I stood and waited with camera ready, and shot the male silver back, looking back through the windows at the visitors. He decided to lie down with his head resting on his hands, and I noticed that there was a sign on the pillar I was stood next to. I positioned myself so that the pillar and the sign were visible, but the depressed gorilla was in the centre of the frame. I knew that this would be a great shot.
I then moved onto the seal and penguin coast area. This was packed with visitors because they were doing the specialised talk about the penguins and it was feeding time for them. I knew this would be great for taking shots of the crowds and the hand feeding of fish which the penguins were receiving. I wanted to try and get the hand feeding in with the crowds of people, as the hand feeding of fish, is not something that ‘Normal’ penguins would do or receive, so by including this into my photograph, I would be able to show the unnatural way of feeding. I managed to squeeze into a corner near a rock. I was angled so that I could photograph the zoo keeper feeding the penguins, whilst being able to incorporate the crowd of people, watching the penguins. Moving onto the seal section, this was not so crowded, however, whenever I seem to think that, the crowd of people then decide to appear from nowhere and engulf you. I managed to cling to the wooden railings overlooking the seals. They were very active as they knew it was nearing feeding time for them too. I managed to shoot several photographs of them jumping through the water, however, I struggled trying to use the correct shutter speed, and by this time, they had moved on, and were interested in something else. Once I had found the correct settings, I managed to shoot three of the seals, looking up at the visitors, as they looked down upon them. This was similar to that of Garry Winogrand’s photograph of the seals he captured. I composed the images, using a long lens, so that the enclosure looked smaller, and I could focus on a small amount of water with them in it, and the visitors watching them. I also then managed to shoot the seals during feeding time on the ‘Pride Rock’ until they decided to move the seals to the separate enclosure.
Afterwards, I decided to visit the Meerkat enclosures. I knew that this would be a popular section of the zoo, so I was expecting to be here for a while. When I arrived at the enclosure, I realised that it wasn’t too full, and I was the only person photographing the Meerkat’s in their outdoor, glass enclosure, yet the inside glass enclosure was full. I decided to start shooting with my 55mm lens, taking shots of them in their surroundings, digging the corners of the enclosure, as it trying to escape, then I decided to use my 70-300mm lens. I decided to use this, as there was one meerkat sat on his ‘Pride Rock’ almost posing for his photograph to be taken. I positioned myself so that I could zoom in for close detail and zoom out for the background. In the outdoor enclosure, there is a ‘Mole Hill’ type area, with glass or plastic windows, in which you can climb into to be ‘Inside’ the meerkat enclosure yourself. Two young male children decided that they would use these and were messing around as their parents attempted to photograph them with the meerkat in the photograph. I decided that like Winogrand and Eeckhoudt, I would use this opportunity to shoot this photograph, showing that these young boys were only interested in messing around, and weren’t interested in actually looking and appreciating the meerkat. I knew that this would turn out as a great final image.
After the Meerkat section, I made my way around the rest of the zoo, taking opportunity to photograph any animals I missed, and incorporating the crowds of people who had descended on the zoo. I left the zoo at closing time which was 16:30, I had been there all day. I knew that I had managed to capture some great images which would work well for final images, and that on some occasions, I was lucky enough to capture images similar to that of the Jaschinski, Winogrand and Eeckhoudt. When I got home and looked through the 500 photographs I had taken, several immediately jumped out at me and got my attention. I knew that these would be the ones I would use for final images, as they were exactly what I was hoping to have photographed.
Final images:
Choosing my final images was not that hard, as the ones that caught my eye, I knew were the ones that would make great final images. I had to keep in mind that I would be processing these into monochrome images. I opened a separate file in my images, and copied these images into the folder. I chose 20 in total, even though I knew I was only to select between 10-12 final images, however, I knew that by selecting 20, I would be able to process them, and decided whether or not they work well in monochrome, as sometimes, an image may look better in colour, rather than monochrome, and vice versa. I decided to use Lightroom 4.4 for processing my images into monochrome, as I am comfortable using Lightroom settings. I have gained experience using the settings such as converting the image to black and white, then altering the colour tones, lights, darks, blacks, whites etc, in order to produce a well composed monochrome image. I would then use Photoshop Elements 9 for any brush tools, such as lightening eyes, details, dodge and burn areas, as I am comfortable using these adjustments in Photoshop.
Regarding processing and adjustments, for each image, I tried to use the same adjustments. I converted the colour image into black and white in Lightroom, I then used the colour sliders to alter the tones of the areas within the image, to make them lighter or darker. I then adjusted the tone curve, contrast, brightness, darkness, clarity, sharpness and exposure. Once this had been done, I then saved the image, and opened it in Photoshop Elements 9. Once in Photoshop, I used the smart brush tool and enhanced details, dodge and burned areas, sharpened areas, and lightened eyes.
The Photographs:
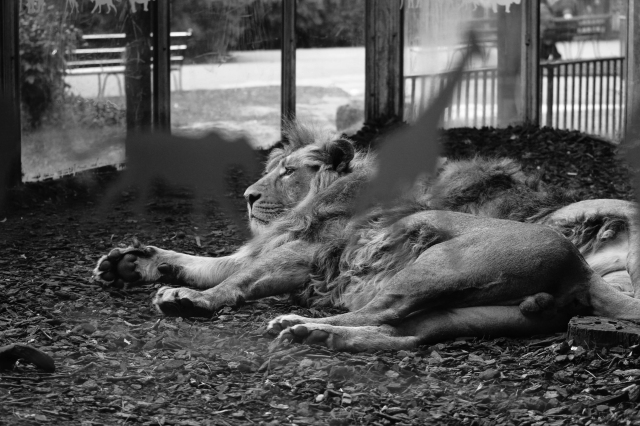
Photograph One: Asiatic Lion Enclosure – Bristol Zoo – 2015
When taking this photograph, I used inspiration from Michel Vanden Eeckhoudt’s photograph of the tiger in the glass enclosure. I wanted to achieve somewhat the same type of photograph, however, at the time when I shot this, there was no one around except myself. This meant that I could then focus on taking photographs, portraying the loneliness of the lions. These lions slept the whole time I was at the zoo, so I was lucky enough to photograph this lion waking up, only because he heard a helicopter flying past. As this enclosure was almost a 360 degree enclosure, I decided not to shoot from the front on, but rather to go around the back, and photograph them with the windows the opposite side, in the shot. This would give the perspective of what the lions see on a daily basis. Through the eye of the lions you could say. In a way, with no visitors around, and only the Lion looking out to a vacant zoo, it appears as though the Lion is somewhat happy that there are no visitors, and now he can get some peace and quiet. It was just unfortunate that there were no visitors standing, watching them through these windows, as this could have been interesting, seeing what the lions see on a daily basis.
By shooting from this angle, I was able to compose a photograph which showed a small area of glassed enclosure, portraying it as being smaller than it actually was. Similar to the work of Winogrand and Eeckhoudt.
I decided to focus the lions face in the middle of the frame, whilst keeping two stickers on the windows visible and framing his face. The stickers on the windows are of a female lioness and a giraffe. I found this interesting, as in the wild, it has been known for lions to hunt giraffes. Keeping these stickers in the shot, allowed me to frame a ‘Lazy, Sleepy’ Lion, with an active hunting type scene.
I am very pleased with the final image, I believe that this image works well in monochrome, more than colour. I was able to enhance the texture of the wood chippings, the details and texture on the lions face and mane and in some places, you can see the scratches on the glass window panels. I also like the different tones in this photograph, the difference between light and dark, you are also able to see the small white glint in the Lions eye. I am to use the colour version of this image in the future, I would probably work on the saturation of colours, brightness and darkness, and sharpening the details.
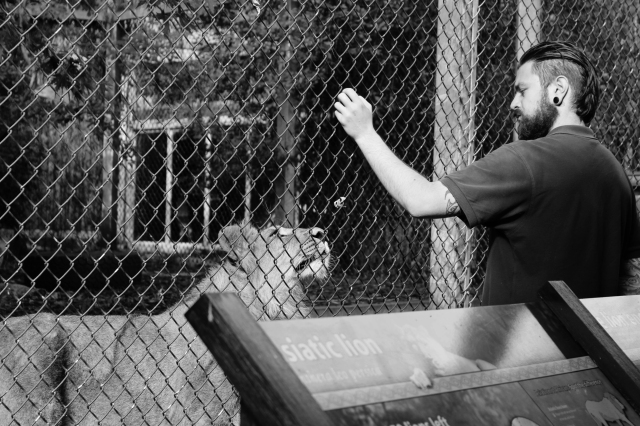
Photograph Two: Asiatic Lion Enclosure – Bristol Zoo – 2013
I took this photograph in 2013, whilst photographing Bristol Zoo for my other assignment. The two male brothers, Kamran and Ketan, were only one year old, so were still babies. My tutor back then, advised me that this image would not be suitable for portraying the ‘Good Side’ of zoological gardens and conservation, as by showing cages, in fact does the opposite, and symbolises captivation, and entrapment. I took her advice, and decided to no longer use this image, but I saved it for another time. For this assignment, I looked back through my previous zoo photographs, and decided to use this image as one of my final images, because it is similar to Michel Van Eeckhoudt’s photograph of the gentleman in the suit, sticking his head into the lions mouth almost.
I know it is not the exact replica of Eeckhoudt’s photograph, but I don’t want it to be. I decided this would be a good final image because it is showing that again, humans aren’t supposed to be this close to wild animals, especially Lions. To be this close to a predator is unusual when you think about it, and similarly to Eeckhoudt’s photograph, it’s only the cages and wires, keeping this zookeeper from being this male lions dinner.
The raised hand in fact had a chunk of raw meat inside, in order to grab the lions attention, as this zookeeper was feeding them treats with a stick. However, showing this raised hand, is almost portraying a circus feeling, when you grab the attention of the animal to jump or stand on its hind legs, to show off to visitors. This was a similar situation, only involving meat on a stick, which made these lions jump up the cages. During this time and situation, I was unable to shoot a clear shot of them jumping with the meat dangling off of the stick, as I needed to change shutter speed, and I was being pushed by crowds, so this was the only clear image left showing what was happening.
I am pleased with this photograph, especially in monochrome. I was able to enhance the texture of the wire cages and the different tones within the image. It definitely works better with this assignment, as to my previous one that I used it for. If I could re shoot this image, I would compose it so the sign board wasn’t in the frame, however, I was unable to do so, because there were too many people stood watching. I think this is a photograph that will have multiple meanings depending on the viewers, however, this is interesting, to see how others interpret this photograph.
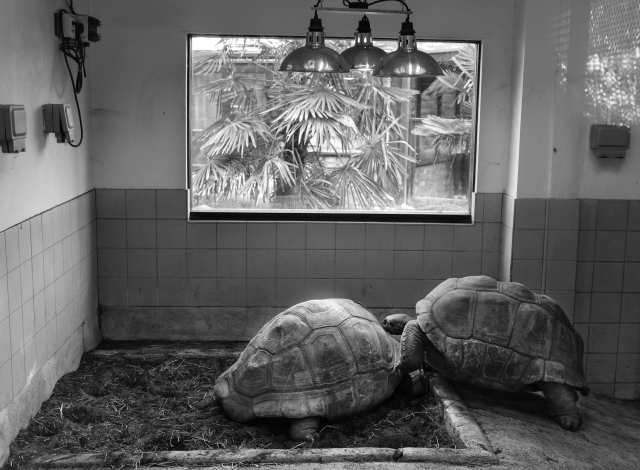
Photograph Three: Giant Tortoise Enclosure – Bristol Zoo – 2015
I spotted this hidden cell which enclosed two giant tortoises. It was barren, apart from the bedding area which one of the tortoises was already sat in. I waited for a while, waiting for the second tortoise to join the first, and managed to capture this photograph. I thought it was an interesting situation, especially as the rest of the tortoises were outside in the outdoor enclosure, yet these two were stuck inside. The one tortoise was trying to climb on top of the other tortoise, and being situated directly below a large glass window, I thought it would create an interesting final image.
Similar to Jaschinski’s monkey photograph, and Eeckhoudt’s monkey photography, I perceived these giant tortoise attempting to look out of the window. Others could perceive it as being loneliness, especially as no one is looking at them through the opposite window. It’s as though they are hidden away, almost forgotten about.
I decided to compose this image by zooming into the room, cutting out the vacant concrete flooring in the foreground, and by only focusing on the two tortoise, the window and the lights above, portraying a small room. I decided to burn the detail into the opposite window, in order to bring out the detail from the trees outside, which would then show the difference between the barren, concrete cell inside, and the sunny outdoors with trees.
I am pleased with this photograph. I am glad that I managed to burn the detail back into the window, which wasn’t that clear in the colour version. I think this is an interesting image, especially as it shows heat lamps, yet outside, it was hot and sunny, and with it being in monochrome, you can’t see the red heat coming from the lamps. Without the inclusion of the red heat from the lamps, it helps to portray this room as being cold.

Photograph Four: Brown Spider Monkey Enclosure – Bristol Zoo – 2015
When I visited the primate section of the zoo, I kept in mind Britta Jaschinski’s work. Her photographs of the gibbon monkey behind cages really stuck with me, especially the facial features and the eyes.
I knew that attempting to compose an image similar to Jaschinski’s would be hard, especially as you are unable to tell the monkey where to sit, and animals don’t usually stay around long enough to shoot clear photographs. However, I positioned myself outside the cage, leaning on a wooden railing, and I was lucky enough to have this brown spider monkey sit directly in front of my camera, but only for a short time. As I previously described above, the noise from inside drove him out, and the noise then outside drove him back in. However, I managed to shoot some brilliant photographs of this monkey.
I positioned him in the frame similar to Jaschinski, I wanted to keep the focus on his face. Photographing him quickly, whilst being able to keep him in focus, yet keep the cage in shot was difficult, but I managed to achieve it. I made sure that I kept his eyes visible, in order to see his facial expression and the depression and sadness, similar to Jaschinski’s gibbon monkey. Even his posture is similar to her photograph.
I was extremely happy with this photograph, and converting it to monochrome was a good decision. It brings out the detail of his hair, eyes and facial features, the ropes from his enclosure and the wires from the cages.

Photograph Five: Brown Spider Monkey – Bristol Zoo – 2015
This was the same brown spider monkey, whilst he was swinging across the cage away from the noise. I decided to use this as a final image because it is similar to Michel Vanden Eeckhoudt’s photograph of the monkey behind the glass window, holding his hands up.
I composed this image making sure that he filled the frame, I wanted him to dominate the photograph, holding onto the cage as if he was a prisoner, or was trying to escape.
My interpretation of this photograph, is captivity, not being able to break through these cages, not being able to climb over the top, but being able to see through the cages the outside world. This brown spider monkey’s eyes and face show these emotions in my opinion. His facial expression is similar to Eeckhoudt’s monkey, the expression of ‘Help’ and confusion as to why this ‘Thing (Cage)’ s holding me back, why can’t I get out.
I am pleased with this photograph, as with the previous image, it works better in monochrome, as you can see the details better, and the tones in contrast.

Photograph Six: Brown Spider Monkey Enclosure – Bristol Zoo – 2015
Taking inspiration from Michel Vanden Eeckhoudt, I decided to photograph the pair of the brown spider monkeys whilst they were inside their glass enclosure. I photographed them with the cages and wires, similar to that of Jaschinski’s work, however, I wanted to include an image which showed the glass windows and people looking through at the animals, whilst the animals looked at the visitors, similar to Eeckhoudt’s work.
Composing this image was difficult, as there were many people inside the glass enclosure area, so I knew that I had to stand at an angle to the glass windows and the visitors, in order to show the layers of glass windows and the people the other side. I made sure that I composed the image, to include the window frame in the centre of the image, as this broke the image up, making the enclosure look even more smaller. I knew that there would be reflections in the windows from the lighting, people and posters, however, I knew that this would be a great image. If I hadn’t of stood at an angle to the window, I wouldn’t have been able to include both the monkeys, the glass from the window and the people on the other side. I also made sure that I included the door where the zoo keepers enter the enclosure, in the frame, as this portrays it being an artificial enclosure.
Converting this to monochrome was a good choice, as the amount of detail, tones and contrast is great. I was able to show the reflection from the glass panels, the people looking through the glass windows, the detail on the wooden structures, the monkeys and much more. I am really pleased with this image. This photograph will have many different interpretations to different people, depending on how they view it.

Photograph Seven: Gorilla Island – Bristol Zoo – 2015
Although none of the photographers I have researched, photographed a male silver back gorilla, I do find similarities between this image and the works of Garry Winogrand. I took Winogrand’s approach at standing back and allowing visitors to do as they please, whilst you shoot away, taking photographs of them looking upon the animal, whilst the animal looks upon them. Although in most of Winogrand’s photographs, the visitors are ignoring the animals, but the animals are interested in them.
With this photograph, I decided to stand back and shoot. I saw this opportunity of photographing this young child, who was actually intrigued and interested in this male silver back gorilla, unlike the children in Winogrand’s photographs.
I composed this image so that the glass window panel was framing the gorilla, again showing that this powerful animal was only enclosed between a glass window and us. It was great that the young child put his arms up onto the railings, that gave the child that interested stance. The gorilla was extremely fed up and his eyes said it all. Like I mentioned previously, when you look into a primates eyes, you can see exactly how they are feeling. This male gorilla flopped into this position and then proceeded to rest his head on his hand, thus showing the human characteristics of how we rest our head on our hands if we are sad, bored or depressed.
I was unsure whether or not to crop the right hand side of this image, making the focus be only on the young child and the gorilla in the window, however, when I made a copy of this image and cropped it, I didn’t find it appealing. I personally believe that by keeping the right hand side of the image still in the frame, I was able to give it the feeling of perhaps a prison cell, with the dividing line from the glass window frame splitting the two rooms. You can also see a second gorilla asleep in the top right hand corner, with the vacant cell below. Converting it to monochrome also helps with the portrayal of a prison cell, as I was able to remove any colour distraction which enabled me to show the blank, colourless walls. Giving the Gorilla, an almost dull, boring and plain room.

Photograph Eight: Gorilla Island – Bristol Zoo – 2015
I took the opportunity to move to the other side of the enclosure, so that I could see the gorillas face, in order to see his facial expressions. I noticed an interesting sign on a post where I was stood, it said ‘Please do not cross the barrier’.
I knew that this could be a great photograph if I composed it well. I decided to bend down slightly, in order to focus on the gorillas face, I wanted to frame him with this post and the post inside his enclosure. By doing so, I was able to frame him in an almost triangular shape. I kept him in focus, which therefore made the writing on the sign out of focus, however, it was still visible and readable.
Keeping in mind that we were in a 360 degree glass enclosure, with only the framework holding up the glass, there was no way we could ‘Cross the barrier’ as we would technically walk into a glass panel. Therefore, this sign has an interesting meaning, and can be see to represent the ‘Barrier’ stopping, holding and keeping this gorilla inside this enclosure. That is why I wanted to include it into the shot.
On the other side of this post, was the details from the cage door, which lead into the second bedding area. This therefore again, shows the cages and not being able to get through them or get out of them.
I am pleased with this photograph, I am glad that I was able to photograph a clear image of this gorilla’s face and his expressions. Framing him in the triangular section was an interesting composition for me. Converting this to monochrome, again was a good idea, as I could show the detail, contrast between the different materials. The white writing on the sign also stood out better.
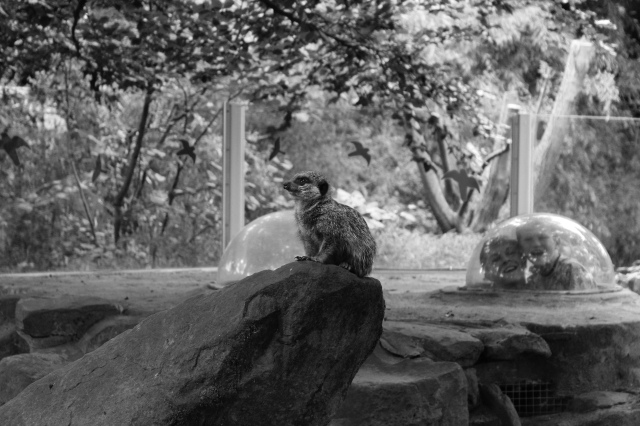
Photograph Nine: Meerkat Enclosure – Bristol Zoo – 2015
Whilst visiting the Meerkat enclosure, we have a see through dome which you as visitors are able to be inside the enclosure, to see the Meerkat’s up close and in detail. I was stood photographing this little meerkat on his pride rock, whilst keeping the glass panels from the enclosure in shot, showing that even though he looks as though he is in the wild, he is enclosed by glass.
However, as I was photographing him, I noticed that two young male children were playing around inside the dome area. Their mother was trying to photograph them with the meerkat in the shot, but they kept messing around. I knew that this was a similar situation photographed by Garry Winogrand of the Rhino’s.
I decided to use my long lens for this image, as I could zoom into the enclosure, cutting out the wide enclosure full of sand in the foreground. Therefore, I could compose it so the focus was only on the two young male children and the meerkat on his pride rock. I managed to capture this photograph at the right moment when both boys were laughing whilst posing for their parents photograph.
What I like about this photograph, is the posture of the meerkat, he is posing like a model, waiting for his photograph to be taken. Yet, he doesn’t realise that behind him are two boys who are laughing at him. It is similar to us humans posing for a photograph, and someone behind making a silly face or ‘Photobombing’ causing you to have a bad photograph. However, this isn’t a bad photograph, and I am in fact pleased with this image. It shows that like Winogrand’s rhino photograph, these boys aren’t interested in the meerkat, they are only interested in making silly faces at the camera, and jumping around.

Photograph Ten: Penguin Coast – Bristol Zoo – 2015
I decided to photograph the penguin coast during feeding time, in order to show how in captivity, you wait to be either hand fed, or you wait until the fish is thrown into the water for you to ‘Catch’. This is not what it is like in the wild, as penguins have the opportunity to hunt for fish every second of the day, not just at certain times like how it is in a zoo or in conservation.
I wanted to copse this image so that I could include the zoo keeper handing fish to each penguin. As you can see, the penguins are still huddled together and are unsure whether or not to approach the keeper, even though she has food. In my opinion, this shows that they are uncertain of their environment, and even though the smell of fish is appealing, they still aren’t sure whether or not to approach, as if they do, they could be in danger.
I also wanted to include visitors in the background, similar to how Garry Winogrand shoots his photographs. By doing so, I can incorporate the feeling of the penguins being similar to an exhibition piece, people constantly watching your every move. I used my cannon lens for this, as I would be able to compose an image which contained everything in it. However, I did zoom in slightly to cut out the buildings opposite the enclosure, which therefore cropped the image.

Photograph Eleven: Seal Coast – Bristol Zoo – 2015
Photographing the seals was not the easiest of tasks, especially as on this day, they were very active, and were jumping through the water, showing off to the visitors. Seal coast is normally very busy with visitors, so I was thankful that I was able to position myself close enough to photograph them.
When photographing the seals, I kept in mind the photograph of seals taken by Garry Winogrand. I wanted to create something similar, where the seals were looking up at the visitors, and either the visitors were looking back at the seals, or the visitors were looking away, uninterested.
I was fortunate to have been able to photograph the three seals, just as they stopped near the bridge, with visitors looking down at them. Unlike Winogrand’s photograph, all of the visitors in my photograph are interested in looking at the seals. This photograph shows a lot of curiosity, more so from the seals. They look curious as to who is watching them, and what the ‘Click, Click’ noise is from the camera.
In terms of showing the bad side of zoos, I believe this photograph shows that especially in terms of the small water space. Like Winogrand, I composed this image by zooming in and focusing on including the visitors and the seals, making sure that I only showed a small amount of water and the closeness of the visitors, to portray a smaller enclosure and to give the photograph an almost ‘Enclosed’ feeling. By doing so, when you look at this photograph for the first time, you immediately think, ‘Is that really how much water they have to swim in?’. However, what people don’t realise, is that I cut out from the frame, the rest of the seal coast, which contained extremely deep water with underwater viewing galleries, and several mountain type rocks, for them to sleep or rest on. If I hadn’t of composed the image this way, and included the rest of the coast are in the frame, I don’t think it would have the same impact, and I personally believe this is what Winogrand was thinking when he shot his photograph of the seals.

Photograph Twelve: Seal Coast – Bristol Zoo – 2015
Keeping Garry Winogrand’s photographs in mind, I decided to shoot photographs of the seals during feeding time. I decided to compose the photograph so that the focus was on the seal in the centre of the frame, in order to balance the photograph. By doing so, I was able to then include the visitors either side watching the seal.
Similar to Winogrand’s photograph of the seals, I noticed that several people were not interested in the seal, and were in fact more concerned about their mobile phones. I noticed a monotonous expression on the face of the zookeeper, which to me shows how his excitement for caring for this animal may be expiring. Perhaps he has worked with seals for years, and the mundane task of feeding the seals for entertainment purposes has begun to bore him too. It’s as though the zookeeper is showing the facial expressions, of what the seal is probably thinking himself.
In my opinion, this is a very lifeless photograph. The seal is sitting waiting for the food, as he knows that the keeper in the suit is the only one that feeds him. The facial expressions on the visitors are somewhat lifeless, as there is only about 4 people who actually look happy to see the seal. Converting it to monochrome also helps to add a lifeless, boring feeling to the situation in the photograph, as by removing colour distractions, I have made the visitors faces the target to look at.
Conclusion:
At the beginning of this assignment, I read through my tutors advice;
“Jumping ahead a little it might be worth thinking about the following in relation to the fifth and final assignment. The shots an editor would be expecting to see in a photo story would be Establishing [setting the scene], Portrait [Human Condition], Action and Detail shots. Obviously depending on what you are trying to say with the work, they would not always include all of these.
Photographic stories are the visual communication of a personal experience. They can be considered unique and can provide an excellent vehicle for personal expression. In order to communicate effectively, you must try to make a connection with what is happening. In order for this to work, you must research your subject thoroughly and if the story includes people, patiently observe before starting to photograph them.
Just to dwell on the subject of the photo story for a while, it is important for you to have a ‘point of view’ or an ‘angle’ for the story. With this work you could argue it was capturing the space of yesteryear. You must have an opinion about what is being recorded and this should in turn come across.”
His advice was very helpful, and when I answer the questions below, you will be able to see why I decided to choose this theme to study my personal project on, and any technical issues etc that I may have had.
When you’ve completed your collection, return to the brief that you set yourself at the start, and consider how well your completed project matches up to your original intentions. Write a reflective account of around 500 words to accompany your images. Below are a few ideas:
- How did you choose your theme?
- Was it a good choice?
- What went well?
- What went badly?
- Did you stick to your original brief or did you find yourself departing from it? If yes, then why?
- What technical problems did you experience?
- How did you solve any technical problems?
- Are you pleased with your final collection?
- What could you have done differently?
- How did you choose your theme?
As previously mentioned at the beginning of this assignment, I remembered some feedback that I received from my previous tutor, regarding an assignment I had submitted. For that assignment, I decided to study my research around the ‘Good Side’ of zoos and conservation, however, her feedback advised me that some of the photographs I had submitted, included cages and windows, which gave the photograph the opposite feeling of what I wanted to portray, and I was in fact showing a bad side, by including these cages. She advised me to research Britta Jaschinski and Garry Winogrand, in order to understand why she was advising me that I should perhaps remove these photographs from my submission.
Therefore, I decided to research Britta Jaschinski and Garry Winogrand’s work, and I was taken back by how amazing yet how sad their work was. I had previously researched animal hunting, animal cruelty, the fur trade and cosmetic testing, so I had some knowledge of researching works for this and photographing the bad side of these subjects, however, I wasn’t aware of photographers who had shot works of the bad side of zoos and conservation, until now. After looking at these photographers, I knew that if I had the opportunity in the future, that I would research them again and study this subject, in order to make my own set of photographs and works based upon this theme.
Ever since I was a chid, I have always loved visiting zoos and zoo like environments, unlike Britta Jaschinski, so for me, getting my brain around the idea that I would have to stop thinking about the good side of zoos and animal conservation, and that I would have to in fact look closer at the bad side of zoos and conservation, for me was going to be slightly difficult, especially as I didn’t want to then stop enjoying any future visits to the zoo. I suppose I thought to myself that once I opened my eyes to the truth behind the animals being born in captivity, never knowing what it’s like to be in their natural environment, never experiencing freedom, it would shock me and I would then start to question myself whether or not a zoo environment was actually a good place or whether or not it was all for show, and deep down it wasn’t all as it appears to be.
This is similar to the blog article written by Peter Barker in 2013, regarding Garry Winogrand’s photographs, portraying what he believed to be the real side of zoos.
I think that by researching the bad side and hidden side of zoos and conservation, before I began this assignment, I was able to get the other side of what we usually see when we visit the zoo. It’s the harsh truth perhaps, and we as visitors are unaware that these things happen behind closed doors. It is slightly hard to believe, and I don’t for one minute believe that my local zoo is anything like these zoos mentioned in these articles, however I wanted to study this theme, in order to decided for myself, whether or not bad sides of zoos and conservation existed, and Jaschinski, Winogrand and Eeckhoudt’s photographs do in fact reveal to us the truth, or whether or not there is some underlying falseness to their works and to the accusations.
100% Yes, it was a good choice. For me to be able to research this subject, something which I had no previous experience of studying, really opened my eyes to something that I never knew really happens or takes place. I have seen things like this on documentaries, and you sometimes hear about these things in the news regarding the mistreating of animals whilst in zoo care or perhaps circuses, however, it is very few and far between that the news do in fact report on stories like this. I personally believe that this is not reported on purposely, as it will cause major problems if the truth behind captivation and the bad sides of zoos, really did come to light, and was publicised. I find this a very upsetting subject, as I am for animal rights, and I hate to see any type of mistreating of animals, hence why this is a topic that I wanted to study, to see whether or not it was in fact true and whether I saw anything like this at my local zoo.
My photographer research enabled me to compare all three of their works, and to see whether or not there were any similarities regarding the cages, enclosures etc. It also enabled me to compare how each of them composed their photographs.
Once I had found similarities between all three of them regarding how they composed their photograph, making sure that they cropped the enclosures, portraying them to be smaller than they were, making sure that they composed it so the cage wires were visible, glass panes were visible and visitors were visible, made me question whether or not all three of these photographers purposely composed their photographs in order to falsely portray the bad side of zoos, or whether they were composed to actually show us as viewers, what it is like to be one of these animals, in one of these small enclosures every single day.
Therefore, yes, it was a good choice, because I would be able to see what is the truth and what isn’t the truth. What has been falsely represented and what is real. Since I was a young child, I have never seen any mistreating of animals in out local zoo, in fact they have been known to rescue mistreated animals from other conservation areas. So for me, to think that my local zoo was covering up the captivation by making it look as though the animals were in their real environment, by painting on their enclosure walls, adding natural sources such as sand, wood etc into their enclosures, was hard to try to believe or disbelieve. I suppose I just wanted to know the truth.
I was able to get the shots that I wanted. I must admit, it wasn’t easy, but I will explain why below, but I am happy with what I managed to shoot.
I was glad that I planned my visit. Taking two lenses so I could change the view of the image, was a good idea. I was pleased with the weather, thankfully it wasn’t raining and it was a lovely sunny day, which meant that I wouldn’t have to worry so much about lighting, getting my equipment wet, or having to trudge around soaking wet.
I was pleased that I managed to arrive early, enabling me to photograph scenes quietly, so I was able to photograph the lions for example, easier alone, than if there was a huge amount of people around. I don’t think I would have been able to achieve some of the shots, if I hadn’t of planned my visit beforehand.
People! I know that zoos are a favourite attraction, but I found the crowds of people, and the manners of the people ever so rude and annoying. I tried to keep calm, I didn’t get flustered, I just wanted to take my time, shoot what I needed to shoot, and then I would move onto the next part. However, I just find that people inside of zoos, can sometimes act worse than the animals that live in them. I was constantly pushed around, causing blurred images, which meant I would have to steady myself again to reshoot the image, I was move along, when I didn’t want to move. It wasn’t thee best. But I suppose that is what shows the difference between the well-mannered animals and the ill-mannered humans viewing them….
I remember my tutors advice regarding photographing people, ‘you must research your subject thoroughly and if the story includes people, patiently observe before starting to photograph them.’ I took this advice on board, and I made sure that in any situation with a large crowd of people, I stood back and waited, photographing along the way, but I made sure to wait for the right moment which could be the right shot.
Another thing that didn’t go to plan was the animals….. They say never work with animals or children. Well, unfortunately, the zoo was renovating some enclosures, so some animals were not available to view, which meant some pre-planned shots, were not available for me to take. Some animals were asleep, or were hiding in their enclosures, which meant that again, I was unable to photograph them how I had wanted. I can’t blame them, I would probably be asleep or hiding from the crowds too, but when I had a pre-planned vision of what animals I wanted to photograph, and they weren’t around, made me somewhat disappointed.
- Did you stick to your original brief or did you find yourself departing from it? If yes, then why?
I did stick to my original brief.
- What technical problems did you experience?
It is hard for me to say really, I found it difficult when shooting in the twilight world. In the twilight world, we have nocturnal animals, which meant it was completely in the dark except for a few small red heat lamps. When shooting under here, it was advised as a rule to not shoot with a flash, which was completely understandable, so I had to adjust my settings manually, in order to photograph them in the small amount of available light. However, it took me a while as I was being pushed again, causing my camera to move, which meant that my photographs were blurred. I was slightly annoyed when leaving this area, as I found the manners of people very rude and annoying. I decided to not use any of these photographs for this assignment, simply because I didn’t feel that they were suitable.
Another thing regarding shutter speed, was when I was photographing the seals. They were extremely active due to it being feeding time, which meant that I had to adjust my settings manually, in order to capture them. However, again I had to stand my ground and stop myself from being nudged and pushed against the railings, causing me to shake, blurring some images.
I also had to decide when to change lenses for certain enclosures, and halfway through, I had to check my images were being saved on my memory card, and I had to add a second memory card, as the first one was full.
- How did you solve any technical problems?
It was just common sense really, I used my settings on my camera and adjusted them accordingly to the situation I was shooting. I positioned myself against railings or rocks, in order to stop camera shake and to steady my hands when photographing moving animals, as I was unable to use a tripod.
- Are you pleased with your final collection?
Yes, I am extremely pleased with my final collection. I am glad that I was able to use the inspiration from my photographer research to help me when I was shooting for these, as I was able to compose these images with their inspiration in mind, which I may not have done if I hadn’t researched beforehand.
I am pleased that I chose to convert all of these to monochrome final images, as I believe that this has made them better. By converting to monochrome, I was able to enhance the contrasting tones, the details on the cages, windows and the animals. This would have been slightly challenging with colour images, as the colour would have been too distracting.
- What could you have done differently?
I don’t think that I could have changed anything regarding my final images, as I am pleased with them. However, I think if I could have done anything differently, It would have been taking more photographs. Unfortunately as I previously mentioned, some animals were unavailable due to renovations on their enclosures, however, if I could have changed that, and they were available, then I would have photographed them, the same with the animals that were hiding or were asleep.
I could also have composed different photographs, especially if there weren’t too many people around. I may have been able to have shot more interesting photographs, however, the amount of visitors stopped me from doing to as I was unable to reach places.
My Personal Opinion:
I really enjoyed the freedom of this assignment. At the beginning, I thought that it may be quite difficult to think of something to base this assignment on, as when you are given the freedom to study a theme of your choice, I usually find it hard to think of something that I haven’t previously studied. You also have to decide whether or not it would make an interesting set of final photographs, and whether or not the subject would be easy to photograph. However, being able to choose your own subject and theme to focus this assignment on, was great for showing something that you felt strongly about.
For me, I have always been an animal lover, and I am against the mistreating of animals in any way shape or form. I have studied other themes regarding mistreating of animals, such as hunting, fur trade, cosmetic testing etc, however, I have not studied the bad sides of zoos and conservation. I remembered feedback from my previous tutor regarding an old assignment, when I had studied the good side of zoos. She mentioned to me that I should research Britta Jaschinski, a photographer who focused on the bad side of zoos and conservation. After researching her work, I knew that sometime in the future, I would most definitely want to study the bad side of zoos, and use Britta Jaschinski’s work as inspiration for any images that I shot. When this assignment came up, I knew that this subject would be perfect for me to focus on. Therefore, researching and studying the bad side of zoos would be a first for me, and I thought that it was be very interesting and would lead to an interesting set of final images.
This meant that I would have to begin this assignment by researching into the bad side of zoos and conservation. I found some very interesting articles online which shocked and saddened me, as to the extent of what really is hidden from us on our visits to zoo type environments, and also what is hidden from us in the media. Doing photographer research also really helped me.
When I was doing my photographer research, I noticed that they all had similar composition, focusing on the animals enclosures, expression, cages and glass windows. I noticed that how they stood whilst taking these photographs could cause perhaps a misrepresentation of the enclosure and the situation at the time. These techniques when shooting, would allow them to produce sets of images which portrayed smaller enclosures, and depressed animals, when in fact, they were cropping out perhaps a huge part of the enclosure, in order to give the shot in the frame an enclosed feel. This was done purposely, to give the final image a better impact on us as viewers. I took note of these techniques and I used them whilst shooting for my images, and I must admit that where you position yourself, and what lens you use can alter your image dramatically. I was able to make enclosures looks smaller than they were. I was able to focus on cages, glass windows and visitors. Some may argue that this is entirely wrong and I have purposely shown smaller enclosures to mislead people, and I couldn’t agree more. I have purposely done this.
I think by doing so, I was able to show that perhaps Jaschinski, Winogrand and Eeckhoudt didn’t shoot the bad side of their zoos. Perhaps they have taken misleading photographs, in order to make it a better story and a talking point. Are their photographs lies? Are they misleading? or are they truthful, and have they actually been able to capture the truth behind the bad side of zoos. I suppose it is something that we will never know the real answer too, however, I can admit, that I used their techniques whilst photographing for my final images, and I believe that I have been able to produce some very interesting, very striking final photographs for this assignment. I have never seen any mistreating of zoo animals at my local zoo, and I don’t believe that what I shot that day shows any mistreating, however, I do believe that I used my composition skills, software processing skills and techniques I have learnt from research, have enabled me to produce a final set of photographs that you could argue, show that my local zoo cages and encloses depressed animals, bored animals, and lonely animals.
I suppose this is a subject that we will never fully understand, nor will we ever be told the entire truth about, as it would cause uproar. However, some zoos and conservation places are fantastic and do care 100% for the animals and their wellbeing. It was hard for me to try to portray a good zoo, as being a bad one. I knew that I would have to in order to produce these photographs, however, it does make me question whether or not these other photographs I have seen, and articles I have read are in fact truthful or not, or are they in fact good zoos that have been portrayed badly, just for a talking point.
I don’t think that we will ever know, however, my view on my local zoo is still a good one. I still love going to the zoo. Maybe I am wrong for those thoughts, but I love animals, and seeing wild animals who are endangered, up close, for me is a special, unique opportunity, that my children or grandchildren in the future, may never get the chance to see for themselves. I treasure the chances that I get to view a majestic lion so close, and I only hope that others do from here on. I also hope that in the future, any problems regarding mistreating of animals in zoos, small enclosures etc, can be changed, and perhaps if light was shone on this subject more, than maybe zoos which are struggling, could receive the help they may desperately need.
References:
PETA article – The Reality of Zoos – Michelle Carr – 2013
http://www.peta.org/living/entertainment/reality-zoos/
Liz Tyson article – 23rd June 2013 – Chester Zoo, UK.
https://www.thedodo.com/community/Liz_Tyson/if-we-really-care-about-animal-601151421.html
Article One: PETA – 13 Times Zoos Were Bad for Animals – http://www.peta.org/features/zoo-animal-abuse/
Article Two: CAPS – 10 Facts about Zoos – March 3rd 2010 – http://www.captiveanimals.org/news/2010/03/10-facts-about-zoos
Jaschinski, Britta.
Britta Jaschinski – Zoo Book – Amazon.
- Hardcover: 112 pages
- Publisher: Phaidon Press (13 May 1996)
- Language: English
- ISBN-10: 0714834726
- ISBN-13: 978-0714834726
Britta Jaschinski Photograph, By Spiros Politis, Jan 01, 2010,
Website: http://www.brittaphotography.com/projects.php
Winogrand, Garry.
Garry Winogrand – The Animals Book – Amazon
- Hardcover: 48 pages
- Publisher: The Museum of Modern Art, New York; 2nd edition (April 2, 2004)
- Language: English
- ISBN-10: 0870706330
- ISBN-13: 978-0870706332
Garry Winogrand Photograph, Self Portrait.
Master Profiles: Garry Winogrand
Garry Winogrand, The Animals Photographs,
http://peterbaker.org/the-animals/
Peter Barker Blog Article, February 18th 2013 –
http://peterbaker.org/the-animals/
Vanden Eeckhoudt, Michel.
Michel Vanden Eeckhoudt – Zoologies Book – Amazon
- Hardcover
- Publisher: Delpire; First edition (1982)
- Language: French
- ISBN-10: 2851071041
- ISBN-13: 978-2851071040
Photo Book and Photographs –
http://www.agencevu.com/photographers/photographer.php?id=83


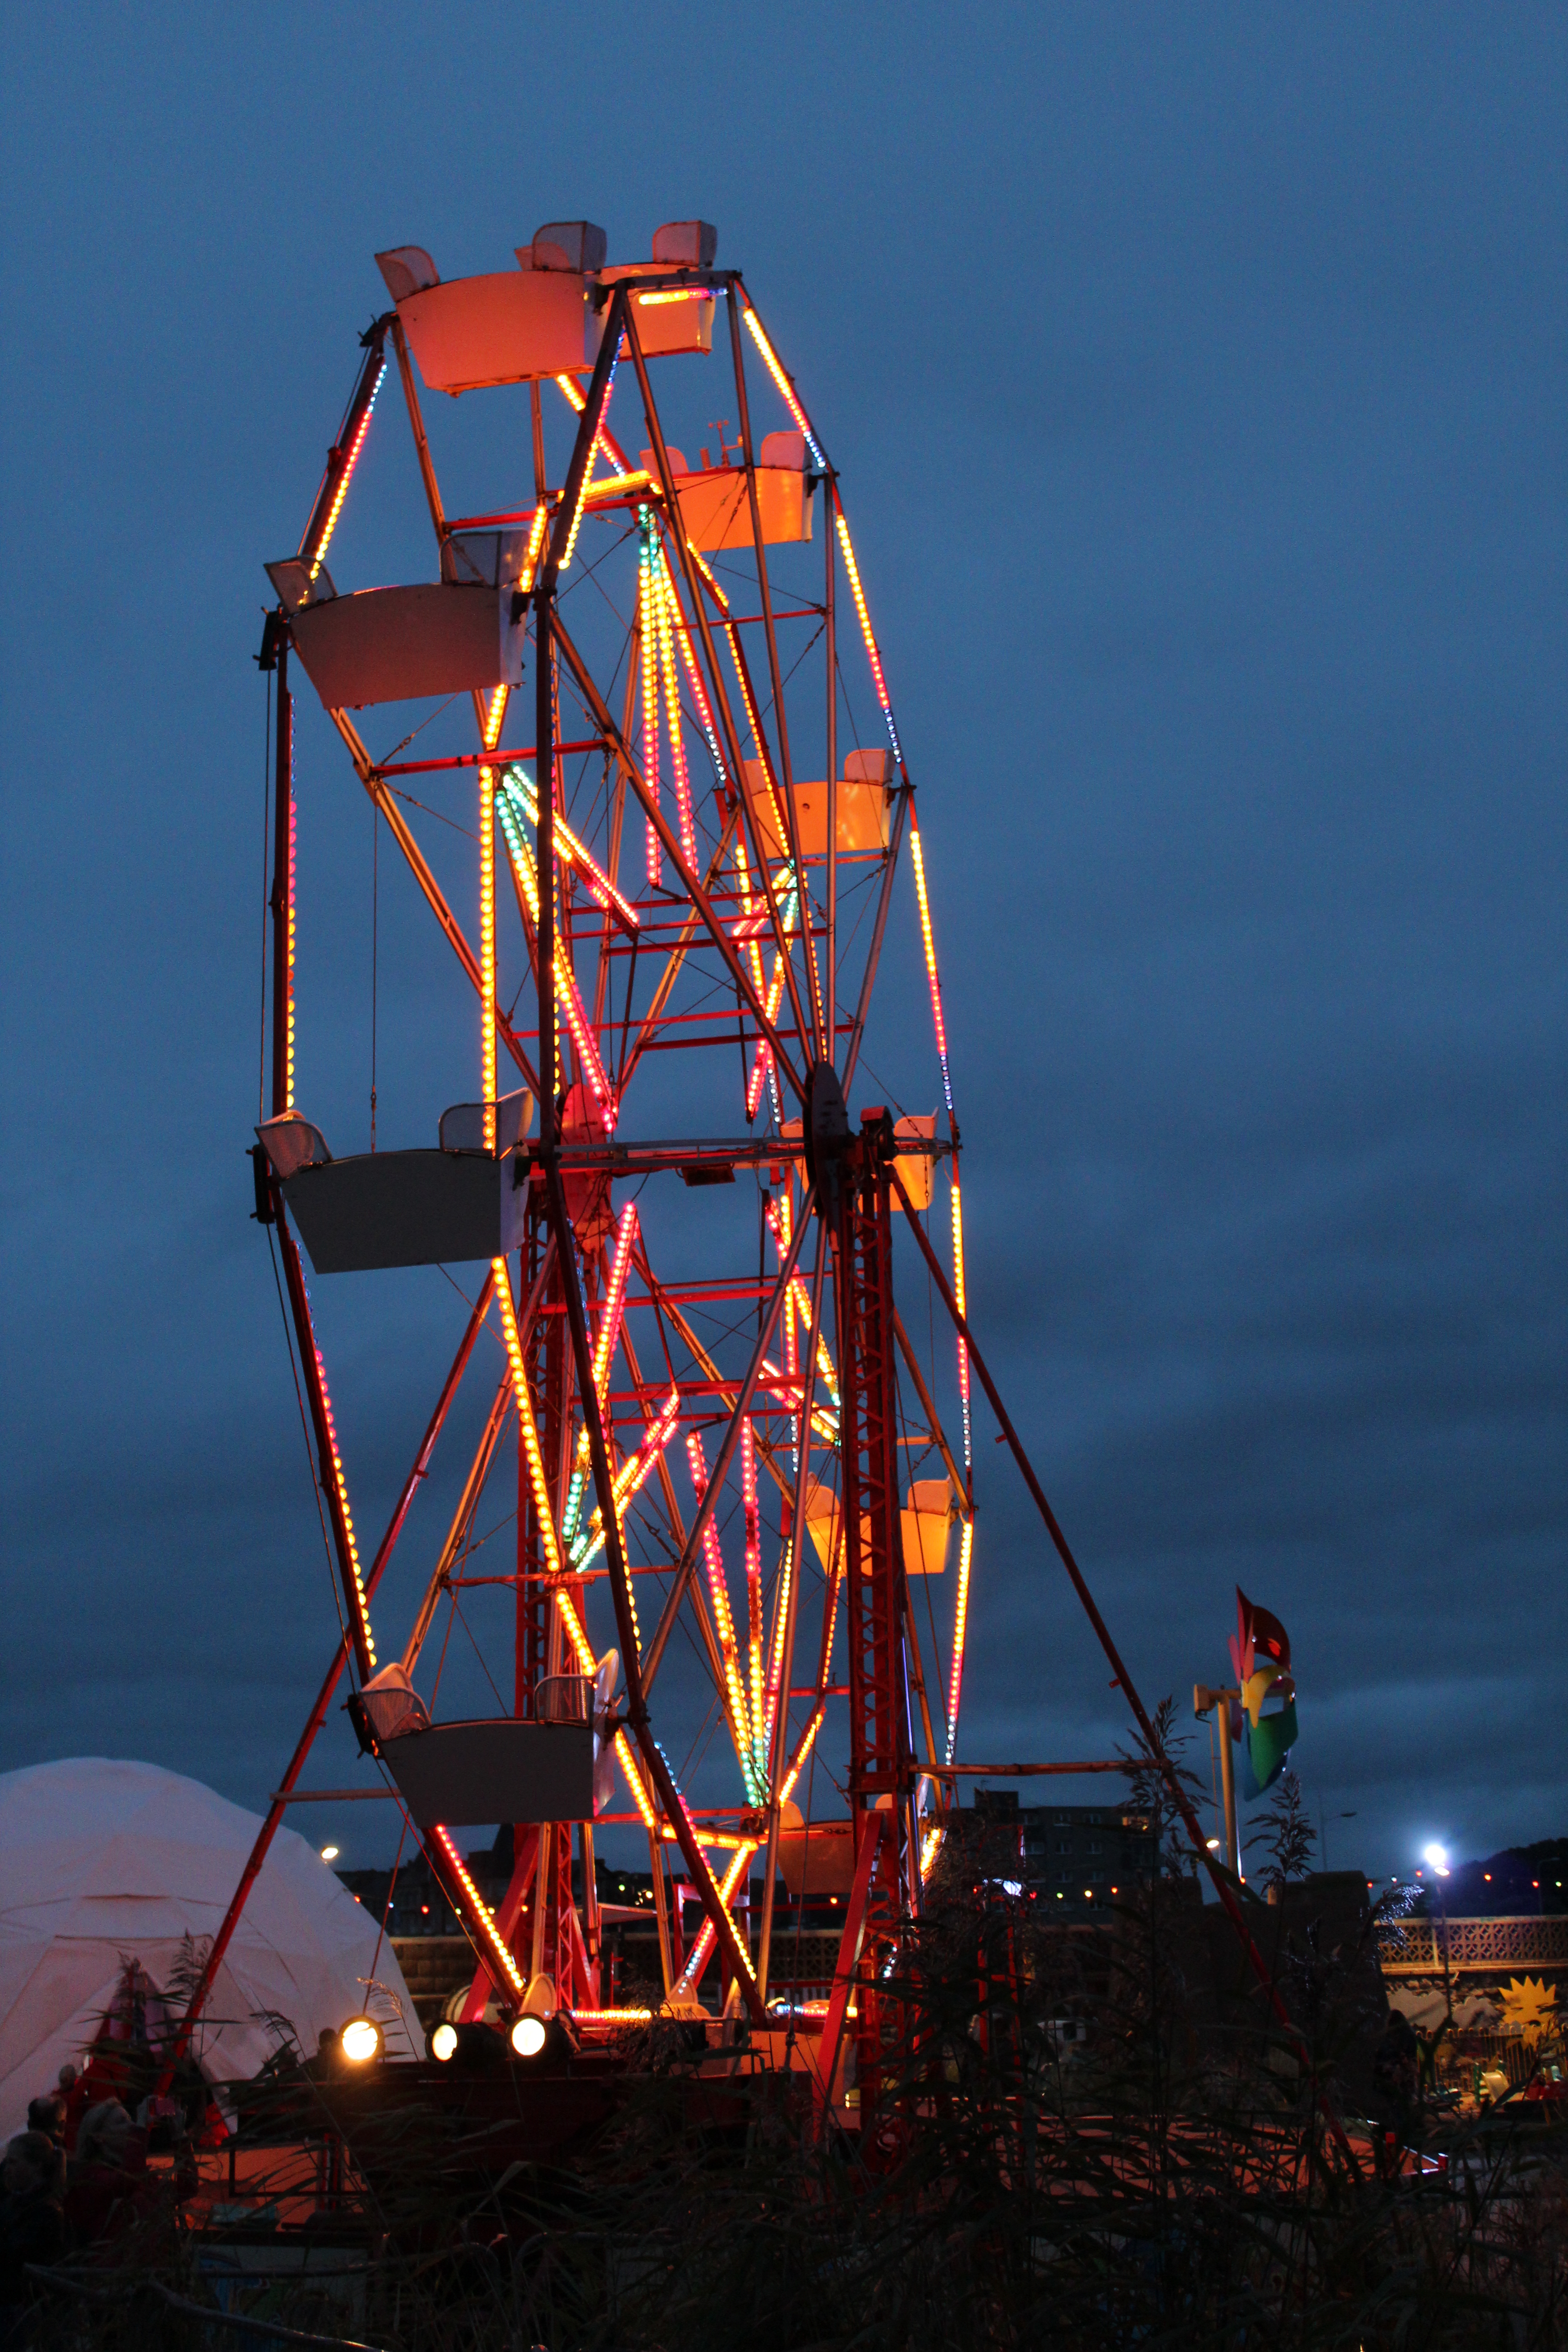


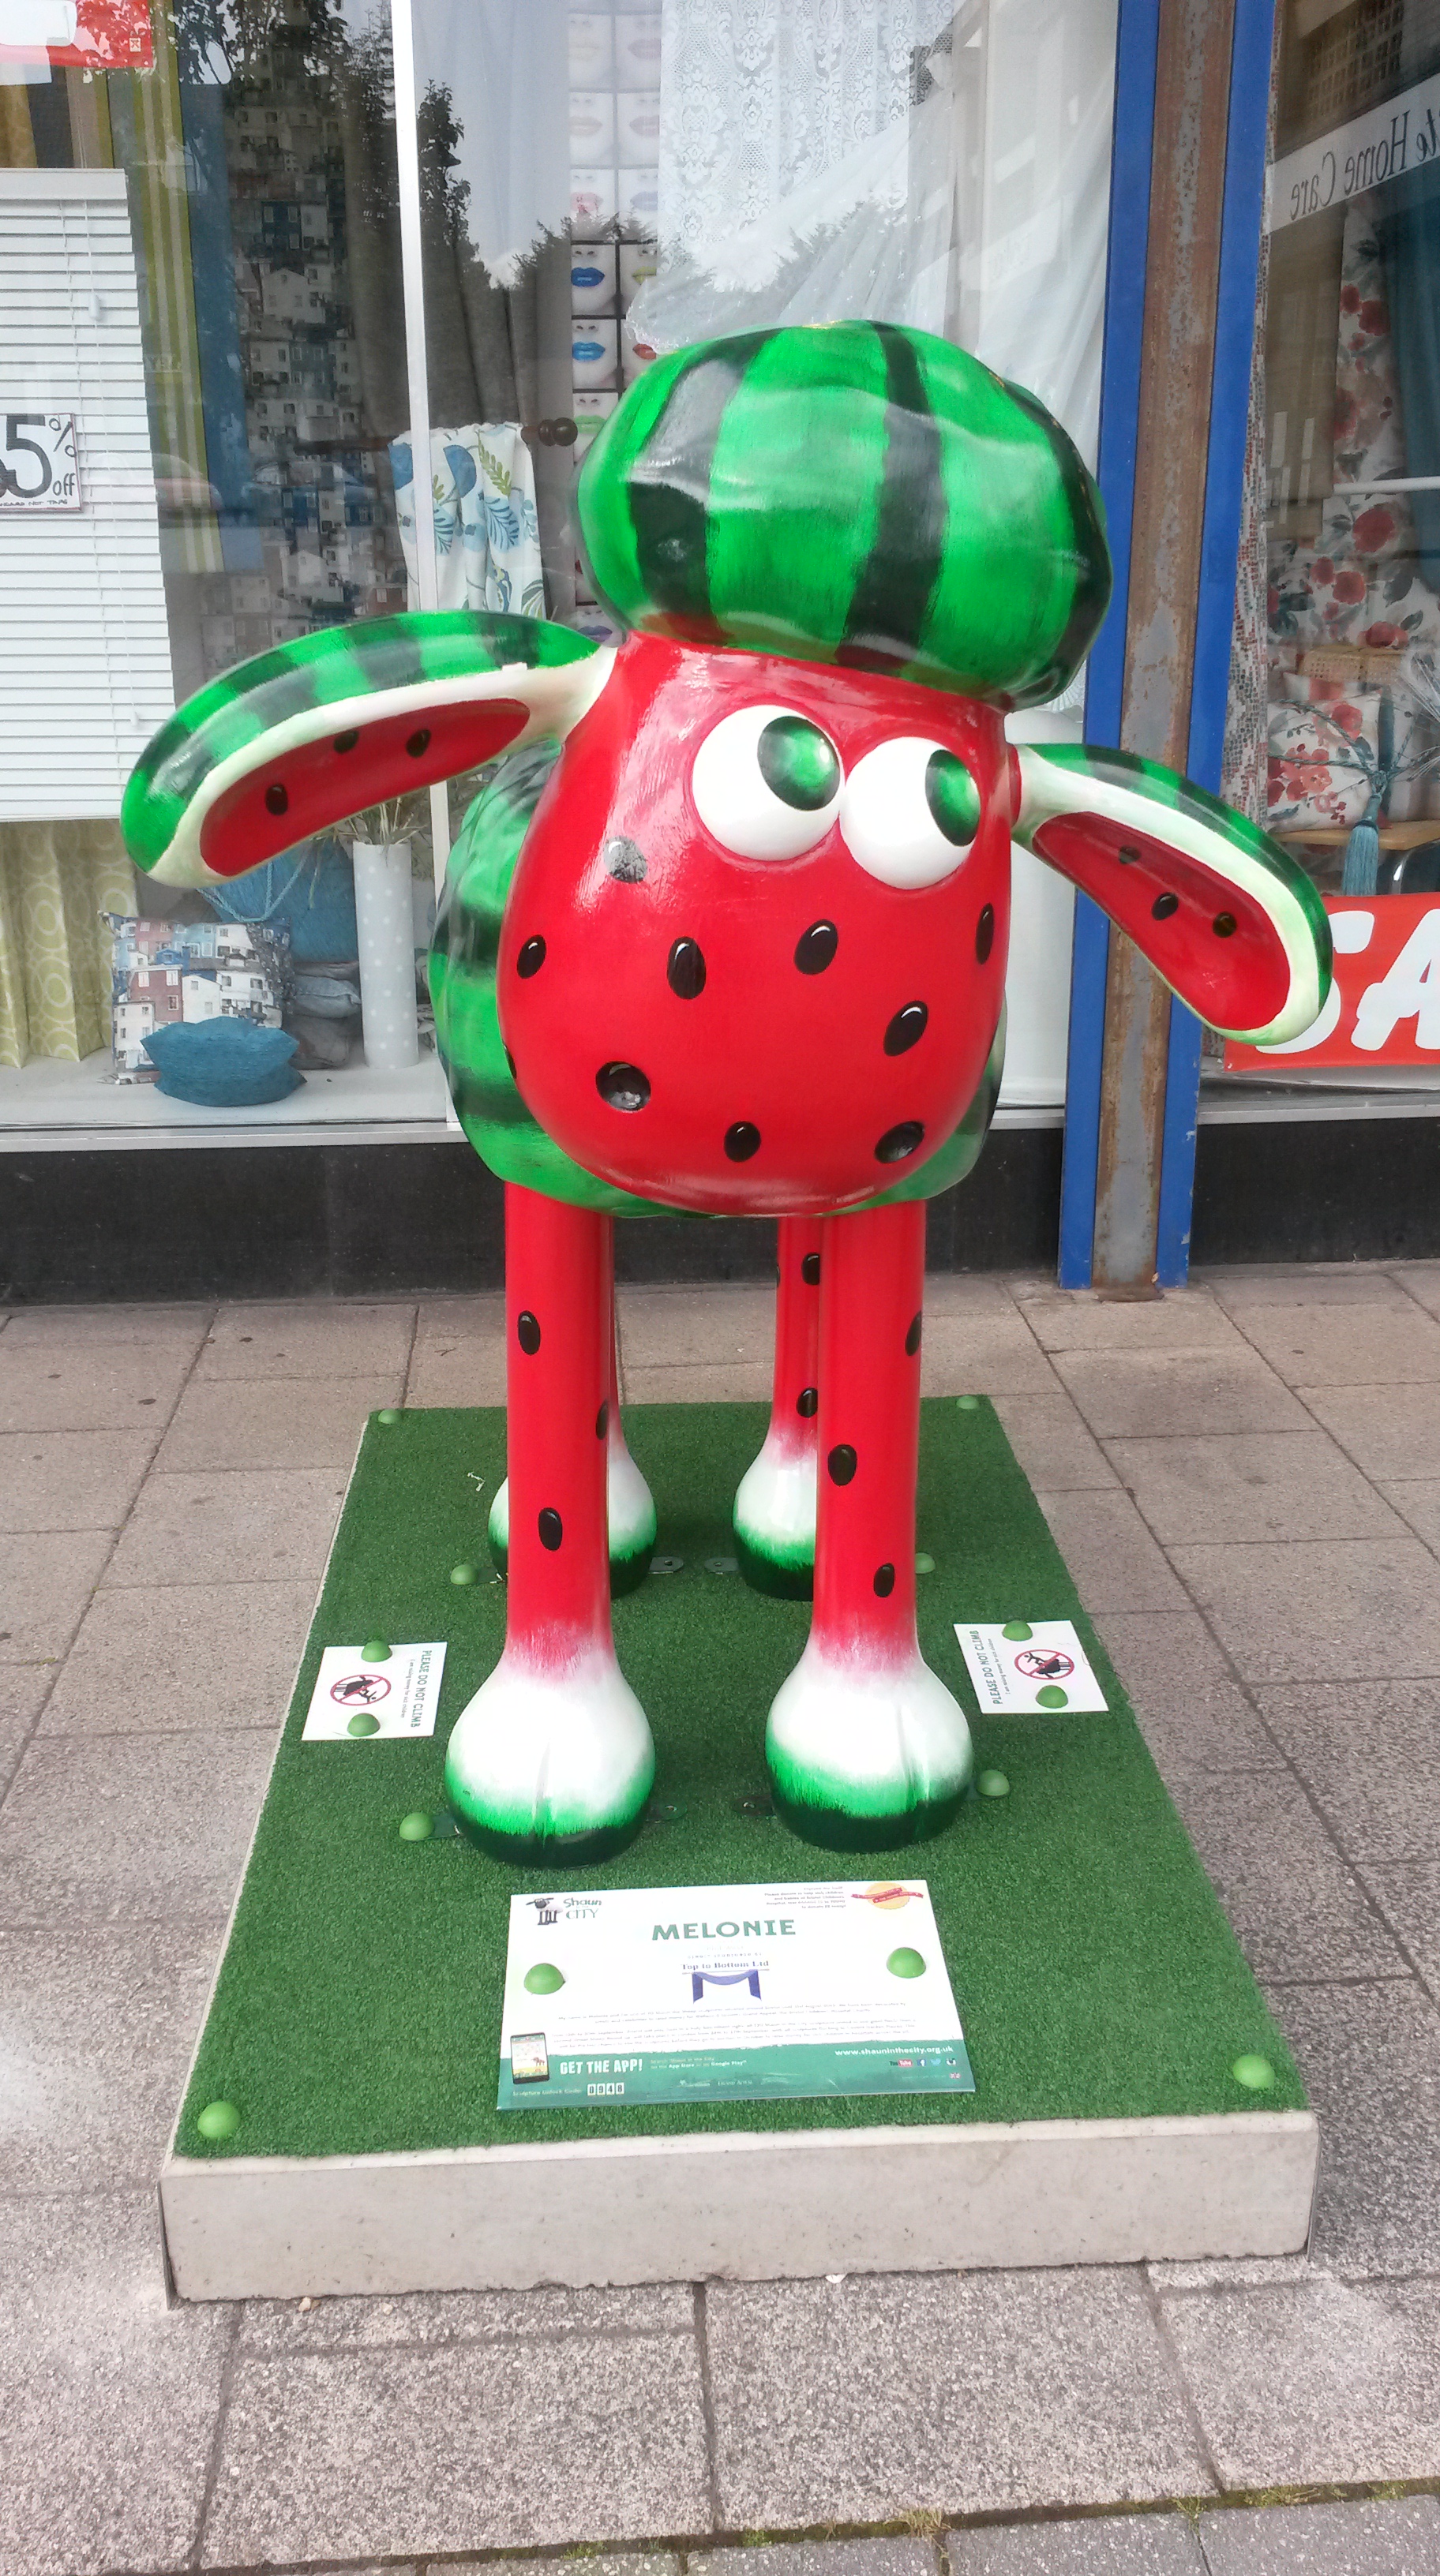


